[FRONTEND]리액트_ 레이아웃
* 중요 : 뷰 클래스(소스 코드) = 위젯(화면에 보이는거 : 화면 구성 요소)
화면에서는 버튼을 버튼 위젯이라고 부르고,
실제 코드에서는 버튼 클래스라고 부르는 식입니다!
그리고 다른 위젯을 담을 수 있는 위젯을 특별히 레이아웃이라고 하며,
레이아웃은 ViewGroup이라는 클래스 아래에 존재합니다.
(레이아웃도 크게 보면 위젯에 포함됩니다)
==================================================================
안드로이드 화면에서 실제로 사용되는 것들은 모두 View라는
클래스의 상속을 받습니다. 즉 버튼, 라디오버튼, 이미지 등은
모두 View 클래스의 서브 클래스입니다.
뷰 클래스는 '위젯'이라고도 하는데, 쉽게 말해 화면에서는
버튼을 버튼 위젯, 실제 코드에서는 버튼 클래스라고 부르는 식입니다.
그리고 다른 위젯을 담을 수 있는 위젯을 특별히 레이아웃이라고 하며,
레이아웃은 ViewGroup이라는 클래스 아래에 존재합니다.
(레이아웃도 크게 보면 위젯에 포함됩니다)
다른 프로그래밍 언어에서 컨트롤(control)이라고 부르는
버튼(Button), 텍스트뷰(TextView), 에디트텍스트(EditText),
라디오버튼(RadioButton), 이미지뷰(ImageView) 등을
안드로이드에서는 위젯이라고 부릅니다.
그런데, 위젯은 단독으로 존재하지 않으며, 위젯을 담아 배치하는 틀이 바로 레이아웃입니다.
레이아웃은 위젯을 포함하는 컨테이너 역할을 하므로 눈에 보이는 개념이 아닙니다.
우리는 버튼, 텍스트뷰, 체크박스 등 눈에 보이는 요소(클래스)를 '위젯'이라고 부르며,
위젯을 담는 틀을 '레이아웃'으로 구분하여 부를것입니다.
==================================================================
레이아웃
https://developer.android.com/guide/topics/ui/declaring-layout?hl=ko
레이아웃 | Android 개발자 | Android Developers
레이아웃은 활동 또는 앱 위젯의 UI와 같은 사용자 인터페이스의 시각적 구조를 정의합니다. 두 가지 방법으로 레이아웃을 선언할 수 있습니다. Android 프레임워크를 통해 이 두 가지 메서드의 하
developer.android.com
LinearLayout - Android Developers
https://developer.android.com/reference/android/widget/LinearLayout
LinearLayout | Android Developers
developer.android.com
상대적 레이아웃
https://developer.android.com/guide/topics/ui/layout/relative?hl=ko
상대적 레이아웃 | Android 개발자 | Android Developers
RelativeLayout은 상대 위치에 하위 뷰를 표시하는 뷰 그룹입니다. 각 뷰의 위치는 동위 요소(예: 다른 뷰의 왼쪽 또는 아래)에 상대적이거나 상위 RelativeLayout에 상대적인 위치로 지정될 수 있습니다.
developer.android.com
ConstraintLayout으로 반응형 UI 빌드
https://developer.android.com/training/constraint-layout?hl=ko
ConstraintLayout으로 반응형 UI 빌드 | Android 개발자 | Android Developers
컬렉션을 사용해 정리하기 내 환경설정을 기준으로 콘텐츠를 저장하고 분류하세요. ConstraintLayout으로 반응형 UI 빌드 Android Jetpack의 구성요소 ConstraintLayout을 사용하면 플랫 뷰 계층 구조(중첩
developer.android.com
TableLayout_표
https://developer.android.com/guide/topics/ui/layout/grid?hl=ko
표 | Android 개발자 | Android Developers
TableLayout은 행과 열로 하위 뷰 요소를 표시하는 ViewGroup입니다. TableLayout은 자신의 하위 요소를 행과 열에 배치합니다. TableLayout 컨테이너는 행, 열 또는 셀의 테두리 선을 표시하지 않습니다. 표
developer.android.com
프로젝트 생성

버전 변경

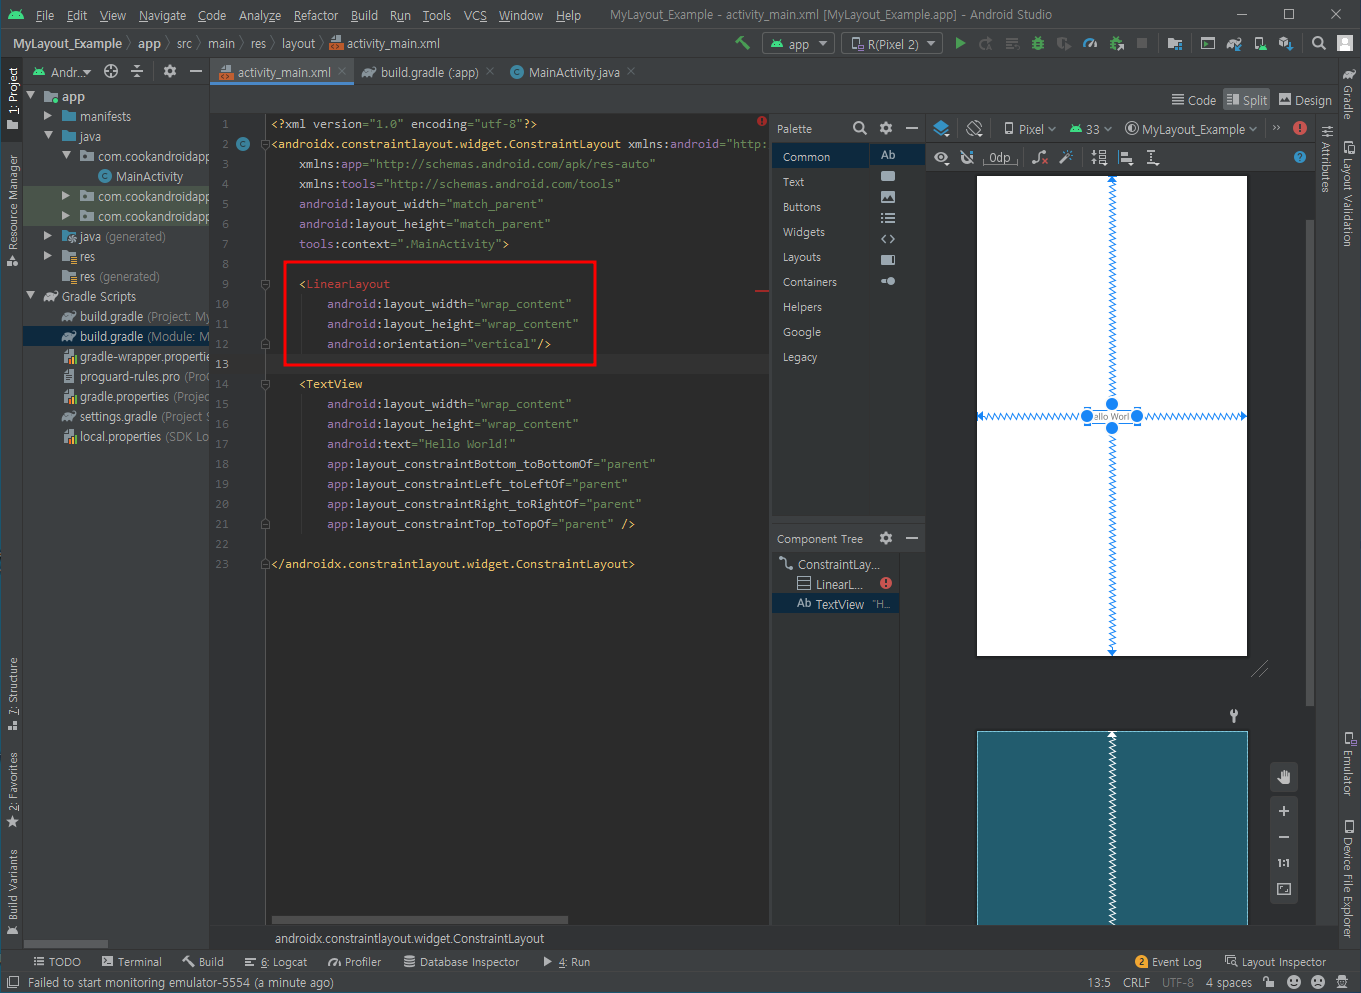

레이아웃 화면 꽉채우기

<?xml version="1.0" encoding="utf-8"?>
<androidx.constraintlayout.widget.ConstraintLayout xmlns:android="http://schemas.android.com/apk/res/android"
    xmlns:app="http://schemas.android.com/apk/res-auto"
    xmlns:tools="http://schemas.android.com/tools"
    android:layout_width="match_parent"
    android:layout_height="match_parent"
    tools:context=".MainActivity">

    <LinearLayout
        android:id="@+id/linearLayout"
        android:layout_width="0dp"
        android:layout_height="wrap_content"
        android:orientation="vertical"
        app:layout_constraintEnd_toEndOf="parent"
        app:layout_constraintStart_toStartOf="parent"
        app:layout_constraintTop_toTopOf="parent">

        <TextView
            android:id="@+id/textView"
            android:layout_width="wrap_content"
            android:layout_height="wrap_content"
            android:text="Hello World!" />

        <Button
            android:id="@+id/button"
            android:layout_width="match_parent"
            android:layout_height="wrap_content"
            android:text="Button" />

        <CheckBox
            android:id="@+id/checkBox"
            android:layout_width="422dp"
            android:layout_height="wrap_content"
            android:text="CheckBox" />

        <RadioButton
            android:id="@+id/radioButton"
            android:layout_width="match_parent"
            android:layout_height="wrap_content"
            android:text="RadioButton" />

        <LinearLayout
            android:layout_width="match_parent"
            android:layout_height="match_parent"
            android:orientation="horizontal">

            <Switch
                android:id="@+id/switch1"
                android:layout_width="wrap_content"
                android:layout_height="wrap_content"
                android:layout_weight="1"
                android:text="Switch" />

            <Button
                android:id="@+id/button2"
                android:layout_width="wrap_content"
                android:layout_height="wrap_content"
                android:layout_weight="1"
                android:text="Button" />
        </LinearLayout>
    </LinearLayout>


</androidx.constraintlayout.widget.ConstraintLayout>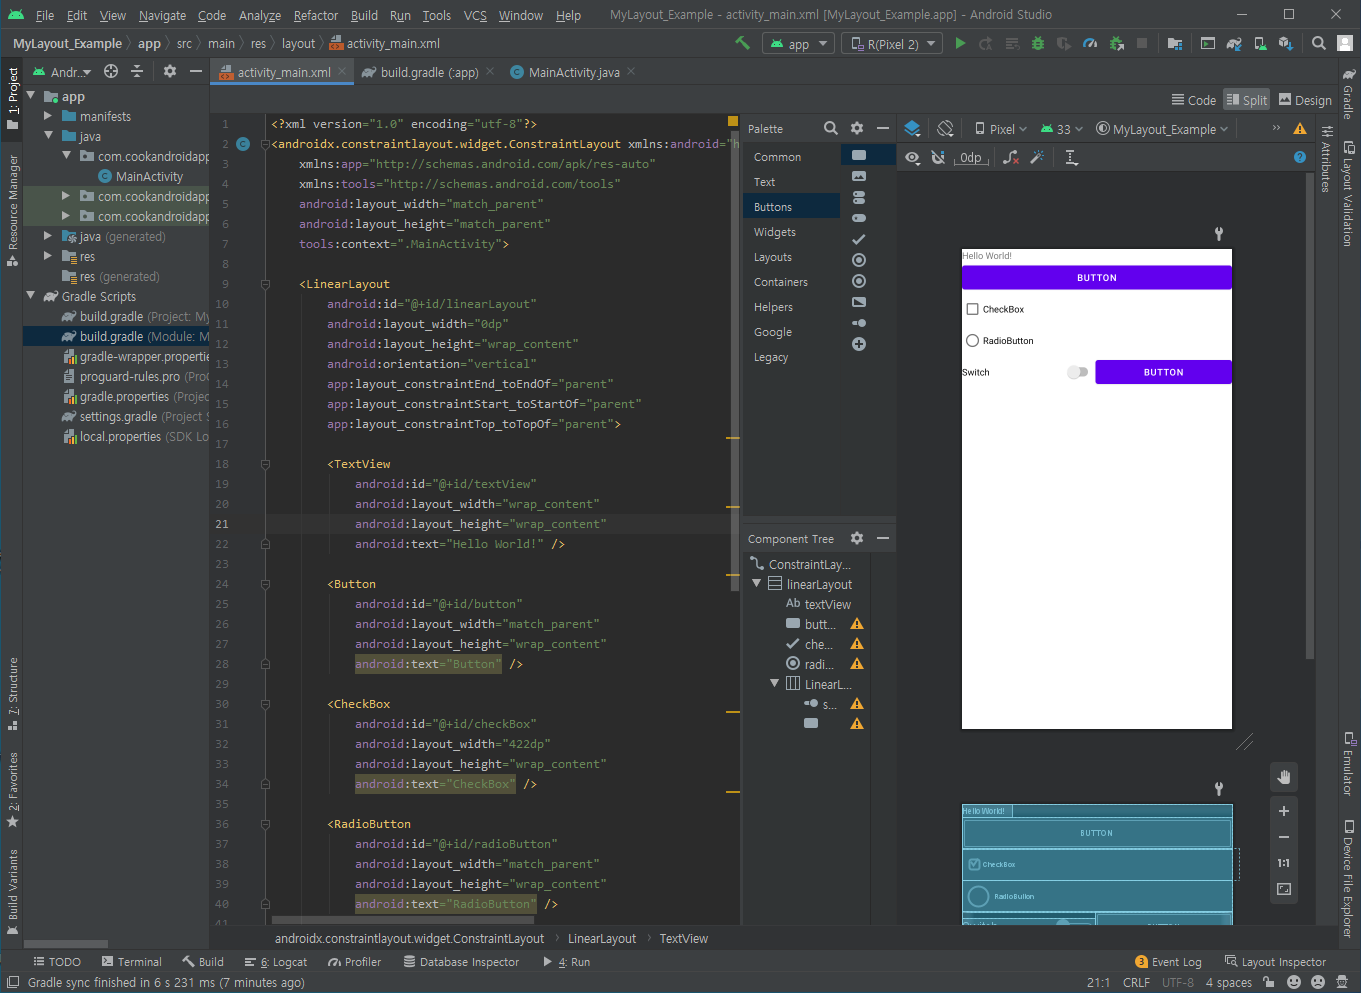


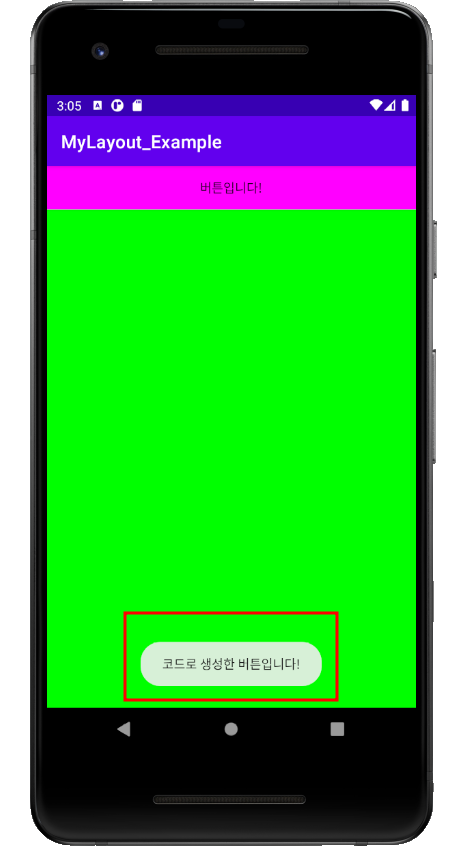
construct 레이아웃 : 반응형 레이아웃


package com.cookandroidappstudy.mylayout_example;

import androidx.appcompat.app.AppCompatActivity;

import android.graphics.Color;
import android.os.Bundle;
import android.view.View;
import android.widget.Button;
import android.widget.LinearLayout;
import android.widget.Toast;

public class MainActivity extends AppCompatActivity {

    @Override
    protected void onCreate(Bundle savedInstanceState) {
        super.onCreate(savedInstanceState);
        setContentView(R.layout.activity_main);

        Button btn = new Button(this);
        btn.setText("버튼입니다!");
        btn.setBackgroundColor(Color.MAGENTA);


        LinearLayout.LayoutParams params = new LinearLayout.LayoutParams(
                LinearLayout.LayoutParams.MATCH_PARENT,
                LinearLayout.LayoutParams.MATCH_PARENT);

        LinearLayout baseLayout = new LinearLayout(this);
        baseLayout.setOrientation(LinearLayout.VERTICAL);
        baseLayout.setBackgroundColor(Color.rgb(0,255,0));
        baseLayout.addView(btn);
        btn.setOnClickListener(new View.OnClickListener() {
            @Override
            public void onClick(View view) {
                Toast.makeText(getApplicationContext(),
                        "코드로 생성한 버튼입니다!", Toast.LENGTH_SHORT).show();
            }
        });
        setContentView(baseLayout, params);
    }
}
버튼을 누르면 팝업이 뜬다!